Powered By Blogger

Thursday, January 24, 2013

Collages-Alma Woodsey Thomas Style

Cut or torn-Alma Woodsey Thomas Collages...always a hit in 3rd grade and a super way to use up the scrap box that is overflowing this time of year.
Original post HERE

Friday, January 18, 2013

Hearts-Jim Dine


I've done this project several different ways over the years but once again changed it up this year. I asked the students to follow the color wheel around when doing their crayon rubbing over the texture plates--making sure to overlap each color in order to achieve the intermediate colors. I base this project on actual and implied textures but now it's became a color wheel project too. The background was done with watercolor markers. At the end we added glitter for texture-I've also done foil in the past.
We also checked out several works of art by Jim Dine.

More Wolf Kahn Trees-3rd


I pulled this project out from two years ago (original post)  and decided to change some things. We really always keep growing as teachers. I decided this time to have the students add a shadow to the trees using the color that would be the next shade darker. The students used oil pastels and pressed very hard with color #1 and then on just one side and branches with the next shade darker- color #2. On day 2 we studied the color wheel and chose contrasting analogous colors for the watercolor background. I added salt at the end and came out with a nice wintry scene. We also looked at several paintings by Wolf Kahn- HERE.

Wednesday, December 12, 2012

Christmas Project Over Load!

A snapshot of the board examples...we're in the holiday spirit 'round here!


So whatcha gonna do, I've been quite the slacker on my blog post, just a little busy I'd say. Here are just a few examples of what's happening in the art room. The kids are so excited this time of year and keeping them hard at work on holiday projects doesn't really seem like work at all! Some of the art projects are classic favs of mine and although I do like keeping new stuff floating in the mix, the older things keep getting better and better each year. The top is a newer project the 'Whimsical Tree.' I got this idea from a paint place here, where people can go in groups or for parties and paint, snacks, drinks and fun. Looks like a hoot, I haven't found one in the St. Louis area yet so if anyone knows of one let me know! I do know there is one in Columbia, MO here.

Whimsical Tree-Basic step by step and watercolor fun!


Next is the Candy Cane over lap project. I found this project years ago when the blog world was just a baby ;)-the post is here.


Candy Cane Overlap


Elf on a Shelf- Kindergarten

Elf on the Shelf using simple shapes and lines. A huge hit with the Kindergartners who all have Elves in their classrooms.


Snow globes by 4th graders- Read more here.


String the lights- From 'Art Project Girl' a while back, couldn't find the link.


Reindeer stuck on the window: here!

Thanks for looking and Happy Holidays to ALL!!!

Friday, November 9, 2012

Statue of Liberty & Patriotic Symbols

I credit this idea to BlueMoonPalette! I thought she had an awesome idea so I wanted to try it out myself. We've had an off week with conferences, professional development day...you get the idea. That however has left some classes leaps and bounds ahead of other classes...so that's when I break out a trial project-you know, one you've seen but didn't know where to fit it in, will it work...ect. So I tried this with a 4th and 5th grade and both did well. Honestly I can't tell the difference between the grades. We started with a ruler and sharpie--no pencils--have confidence folks! They could use diagonal, horizontal & vertical to fill the simple buildings. Students had to free hand the flag and they could color the flag with any medium, most chose markers. Right before we drew Lady Liberty together we watched this short film twice, yea TWICE--it has a lot of good information but it goes really FAST! The kids picked up more things the second time around. A good little project to teach about patriotism, fore-mid-background, pattern, color, shape..lots can go into this. I think I'll stash it and do it again next year.
Supplies:
12X18 White
Sharpie
Ruler
Any color medium
9X12 light green
Glue

Happy Veterans Day to all the Veterans! Thanks for all you do or have done for our country!
Below are two of my favorite veterans-my grandpas!
Miss you & love you both!

Korean War Veteran- Donald Porter

World War II Veteran -Wayne Briscoe

Wednesday, November 7, 2012

Flag & Shading- Pastels

 4th graders made these flags all while working with lines and shading. Using curved lines and shading with those curved lines made all the difference in this project. Students really had to work hard to create depth by using light and dark tones. We did lots of stepping away and looking to see how much flatter straight lines look compared with the roundness of the curved lines. Also looking that darkness recedes and lightness comes forward. These are big concepts for fourth grade, but they're oh-so smart! The end results are just wonderful! They go so well with our other veterans day decorations!
Supplies:
12X18 White
Rulers
Pencils
Red & Blue Chalk Pastels
Black or Blue Crayons

Day 1: Make 4 diagonal lines in opposite directions across a landscape paper. Curve the first row into frowns, and the second row into smiles...keep going with this pattern. Make simple stars ( upside down 'V', legs out & a 'W' doing the splits). Shade with pencil first making sure to use curved lines rather than straight.
Day 2: Shade the same with the red pastel as the pencil (on the sides) and use your pointer finger to blend the red for a lighter/softer tone. Make sure to curve with the smile or frown shape. Outline the stars in black or blue crayon and do the same as the pencil and red only top left of course is the blue. This took 2 full one hour classes.

Friday, November 2, 2012

Soldiers & Camouflage

2nd Grade Soldiers

2nd grade soldiers
Day 1 painted free form shapes
I drew this on the back of the students' 12x18 painted camouflage paper
Veteran's day is coming up next weekend, so to show our support in 2nd grade the students made their very own soldier. Day 1: we drew free form shapes that attached and then painted everything in with our color scheme of green, brown, black & tan. On day 2 I had drawn lines (see above) on the back of the students paper. They cut out the pieces, chose a skin tone and began to construct their soldier. Some made their dad, grandpa, aunt, uncle and even moms can be soldiers too! Some students added a name tag, stars, rank, flags and buttons. I'm sure the Veteran's who come to our celebration will enjoy seeing these up in the hall.
Supplies:
12X18 heavy paper
thin brushes
green, brown, black & tan paint
construction paper in skin tones
scrap box of paper to make small things

Wednesday, October 31, 2012

Up Up and Away...


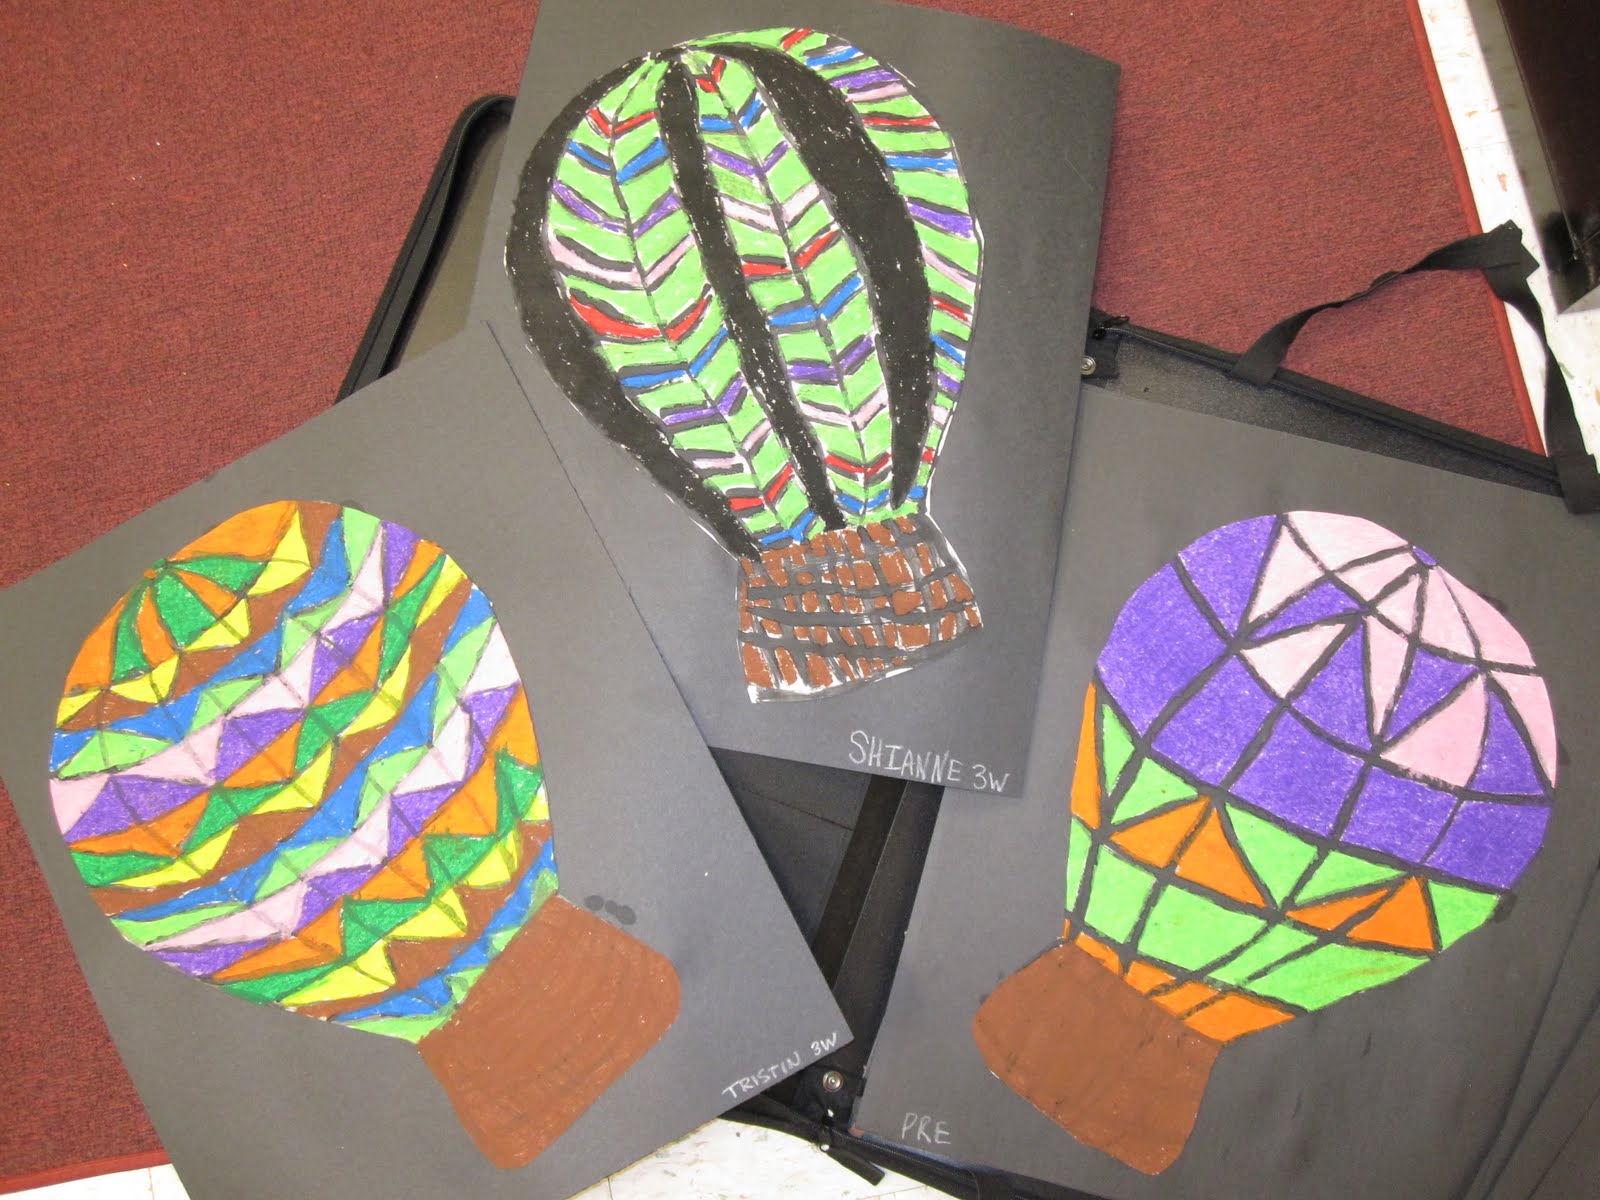
After seeing something similar on Pinterest, where else, I decided to have 3rd graders create these balloons. They did trace around a template I had made and then I let them choose a pattern for their balloon after looking a several different designs. They drew in pencil, painted line in black paint for the first class. Day 2 they used oil pastels to color in their designs, cut and glued onto black construction paper. The balloons were drawn on 12X18 and the large paper was 18X24. Original Balloon Idea Here

Friday, October 26, 2012

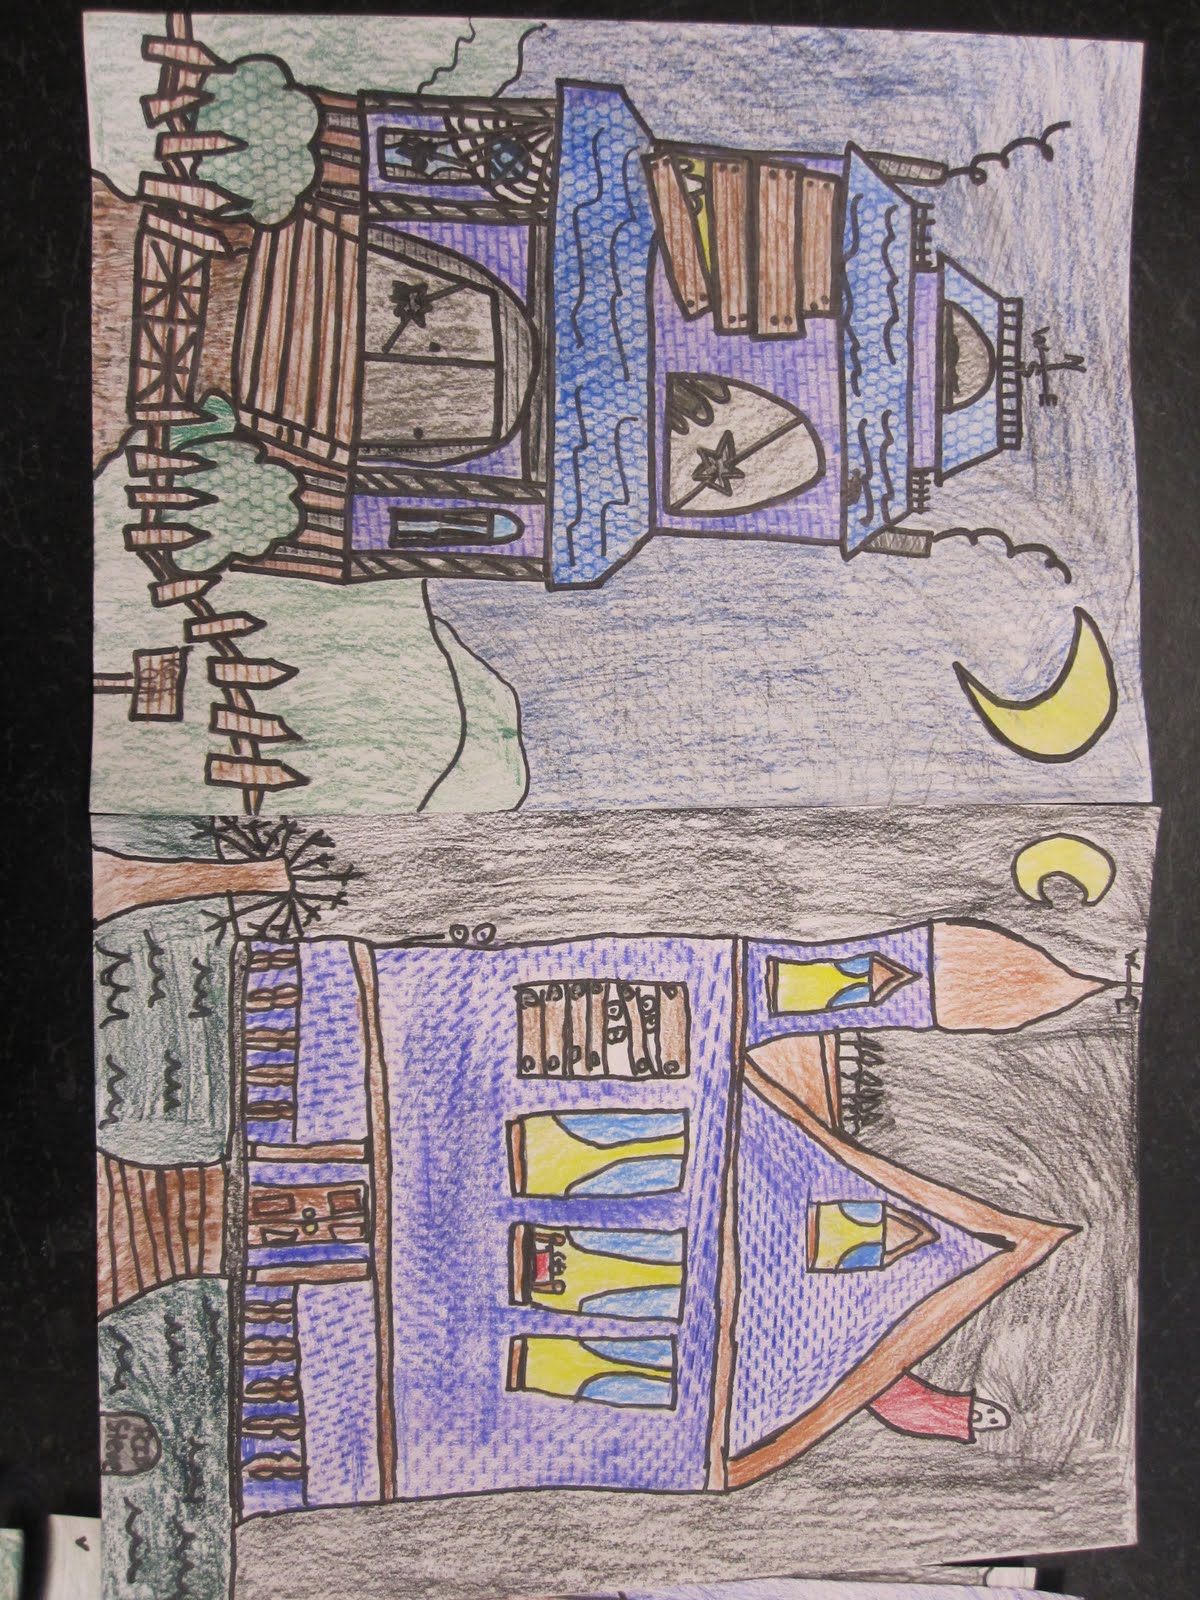
Victorian Haunted Houses


Always a favorite with my 5th grade students! We discuss the Victorian era of Architecture and how times were about 100 years ago. We compared several styles of architecture: colonial and their symmetry; cape cod style with their dormers; and bungalow homes with overhang porches. We also looked at present day style of homes (Ranch style) and how things have changed --attached garages, one story with basements, & central air. There were a few great videos on YouTube that showed the gorgeous details of these Victorian style homes, some even showed the interior.
I showed the students how to break down these homes into geometric shapes and then add spooky details, but not too many or it could get cheesy looking. I bought some architecture texture plates for this project and am so happy with the results! Students used colored pencils for the color and the texture plates only in the facade. Fun, fun, fun!!

Friday, October 12, 2012

Secondary Color Mixed Pumpkins


First graders mixed colors and painted lots of paper for these fun little pumpkin collages. Day one the students were only given the primary colors and had to mix to make the secondary colors. Orange & violet on 9x12, & the green was 6x9 size white paper. Today we cut the violet into 'horizontal' strips and glued onto a 12x18 purple sheet. On the orange they drew a LARGE oval for the pumpkin & added their own face creation from the black, white and brown paper I had for them. Last they used 'vertical' lines for the grass. Nice job kids! So fun to see these in the hall! Happy Friday Y'all!!

Wednesday, October 10, 2012

New Twist on an OLD project


This project has been around for ages...or as long as I've taught art ;) and I have always used torn paper see old TORN OWLS <------there. Since kindergarten just did torn paper Grovers HERE, I thought we'd do a little something different. Based on all of our cutting and gluing practice that's been taking place I knew the kids would do well with layering and over lapping. I had them trace and owl template I pre-made, then gave them several light, medium and dark browns (2x3) pieces to cut the bottom corners and little corners to create a "U" shape. Students glued the Tufts on first (pointing upwards), and then I came and made glue lines so they knew where to start at the bottom and layer the feathers upward. Finally we added eyes, beak and sharp talons ;)! This took about 55 minutes including a little 5 minute clean up. The last 5 minutes we talked about the life of and owl, discussed predators & prey as well as learning some parts of the owl. A nice little once day-er as I like to call it! Happy Wednesday Artsy Peeps!

Friday, October 5, 2012

Pumpkins with Glue Lines


Happy Happy Friday All! Here is a little project (2 day-er) I did with my 4th grade students this week. We talked about contour lines, how a raised surface from the glue creates a shallow relief, secondary colors and last how to make a lighter or darker shade of color without using black or white. I used this Pumpkin Tutorial to help guide them a bit. Sometimes I find my own demonstration is even better with another visual option...for all you visual learners out there! I got the inspiration pinspiration from HERE, she did the project with older grades. Love these, really brings some fall to the air hanging in the hallway! I'm outta here! Happy weekend Peeps!

Wednesday, October 3, 2012

Painted Sunflowers-Kindergarten


Kindergarten started this two day (1 hour per class) project by painting 4 pieces of paper- 12X18 blue, 9x12 yellow/orange, 2x12 green & 6x9 brown. I thought it was going to be too much but they did really great! We worked on brush strokes, pulling rather than pushing paint & washing out our paint brushes. On day two I had pre-cut the yellow-orange sheets into 2x3 rectangles so the students could cut off corners and round edges for an oval shape. I also had them trace a small circle lid 3 times in order to see where to glue the petals, a circle was traced for the brown centers, stems added and a they fringed the grass. This could be used for an Eric Carle project as well. Fun stuff y'all!


Monday, October 1, 2012

Candy Corn Dish- Fun Art 4 Kids Idea

HERE! is where I've been saving this little gem of a project for TWO years, ya! I'm back in my classroom and off the cart so by all means we are starting clay up right away! I did these little slab dishes with second grade. I also forgot to do the bisque fire...oops really busy, so I skipped a step and had the kids glaze onto the green ware...results were no different from the classes where I bisque fired and then glaze fired! AWESOME! Now I don't have to do so much firing!! Yee HOO! Has anyone else tried this!? THANKS so much for the idea over at 'Fun art 4 kids!' Love that blog!

Friday, September 28, 2012

5th Grade Colorful Landscapes

Another spin from a Pinterest link, finding lots of good stuff over there! I think I've tried new projects with every class this far from Pinterest. This was a project about fore, mid and backgrounds, balance in the composition, and of course we worked around the color wheel. We did a step X step drawing first, the students could add a little of their own flair to the picture, sharpie step, and then they used lines to follow the shapes for a little more visual interest and last we painted with liquid water color. The results are super! I just sent some to our local Culver's Restaurant where they display our schools work every month.
 Does your school do any type of public display on a regular basis?